Showing posts with label tutorial. Show all posts

Monday, October 1, 2012

Cookie monster cupcake tutorial

Here's a quick tutorial for the Cookie Monster cupcakes I did for my son's 5th birthday party - they're super easy, and all you need is this Grass/Hair piping tip.


I started with my super-moist choc fudge cupcake...


Since the cupcake's top was flat, I made a "mound" using a crank-handle palette knife 
to get a rounder shape for Cookie's head.


Start at the base and pull-up and out towards you. You'll get the hang of it pretty quick!


Furry cupcake!

These are white choc buttons you can get at any supermarket


Pipe some black buttercream using a No. 2 piping tip for the eyes

Pop the eyes in at an angle to make the all "googly"!!

Break a cookie in half and stuff it in!
Voila! Cookie monster!


Monday, August 27, 2012

Bunting tutorial

This is a short mini-tutorial on how I made the cute bunting you saw here.

First you'll need the following materials. I basically used whatever scrap material had in my craft drawer.

I had a pretty printed cardboard box, twine, and some lacey doiley wrapping paper.
Also a 5-cent piece, cardstock, a pencil, double-sided tape, bamboo skewers
and craft scissors with a scalloped edge.


Here's what I did:
1.  Cut triangles out of the cardboard.
2.  Cut rectangles out of the lace wrapping paper with the craft scissors to get that frilled edge.
3.  Stick the triangle onto the lace with the double-sided tape.


4.  Next, trace the 5-cent piece onto the card stock, and cut tiny circles out.
5.  Use a pen to draw a pattern on the edge of each circle. Spell out the person's name, 1 letter per circle.
6.  Stick the circle onto the triangle piece.


7.  Measure out a long piece of twine, around the length of the diameter of your cake, and tie to the two 
     bamboo skewers.
8.  Lay each circle-triangle-rectangle piece in the correct order (front facing down), and stick the twine onto
     their backs.
9.  Flip up, and voila! You've got your bunting, now stick it into your cake!


In this variation, I had a long strip of the lace paper and stuck the triangles onto it, 
then cut in-between to create the gaps.

Crafty, eh?


Thursday, July 12, 2012

Owl cupcake topper TUTORIAL

Here's a tutorial on how I made the owl cupcake toppers:

First I drew a circle using a circle cutter roughly the size of my cupcake.
 Then I drew the picture of the owl within the circle.
Finally, I traced its shape onto card stock & cut out the template.

Roll out some yellow fondant.
Cut out the owl's shape using the template.


Cut out grey fondant using a small flower cutter.
Doncha love the combination of grey and yellow?


These "flowers" will be used to form the owl's eyes...


...like so!


I used a bit of water to stick the fondant together.


Next I used my smallest circle cutter to cut out the "whites" of his eyes,


and stuck them on. Repeat for the other eye.


Next, roll out some black fondant. 
All the fondant eye components were rolled pretty thin.


I used a piping tip to cut out the "blacks" of the eyes.


All the different parts ready to be assembled. 
(Oh yes, keep them under cling wrap so they don't dry out!)


Stick the black eyes on.


This part requires nimble fingers.
Roll out some teeny tiny balls of white fondant between your fingers to highlight the eyes.


Then roll even tinier balls for the highlights again.
Stick one under each of the first two balls.


That's how it should look.


For his nose/beak, roll out some peach or orange fondant and cut out
with an oval cutter with pointy ends. 
(This cutter came in a set with a tiny heart, spade, diamond, club etc.)


Use the pointy end to cut into the oval and...


...voila! A beak! 


 Stick it on gently.


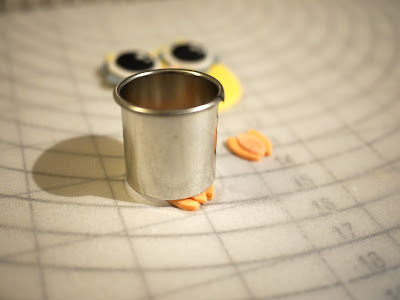
Cut more ovals as we'll use them for the feet too, like this!
Lay two next to each other, then stick a third on top.


For the 40 cupcakes I made, I cut up about 240 of them (with some help of course!!)
Here're a few of them:


Once the feet trios are made, use your small circle cutter again to cut out the bottoms.
(Teehee...doesn't it look like a barrel trying to run away?)


 Cut the feet, stick them onto the owl and tadaaa!!


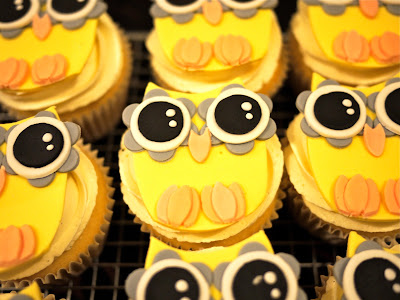
 Owl cupcake toppers!


 I also made a little "girly" owl using pink fondant for the belly:


Here's how they looked, side by side:


 The finished cupcakes! 


 Hoooot hooooot!!


There! Hope you enjoyed the tutorial as much as I did making these cute lil' hooty owls!

PS. And see you at the Southside Handmade and Vintage Market on July 28th! Me and Peek Sweets will be there selling our wares.


Sunday, April 8, 2012

Of Princesses and Planes

It's been a month since my last post! Geez!

If you've been following the bakeshoppe's Facebook page you'll know what I've been up to lately... if not here's a quick pictorial rundown:


Jeremy the Jet Plane cake for a little boy.
I marbled the fondant for a "sky" effect (it's clearer in the first pic)


My Cake Pop class with family and friends!


Uber Oozy Chocolate mini cake.
With hand-stamped edible ink text.


 Princess cupcake for my 4 y.o. niece, thanks to a tutorial from The Cupcake Gallery.
A friend of mine said she kinda looks like a Kardashian!
(The cupcake, not my niece...although Anna can be a diva sometimes!)


Who's ready to go a-huntin for some Easter eggs?


And Cartoon Easter Bunnies!
I was experimenting with Sweet Sugar Belle's 20-second icing method.

So! That's what I've been up to the last couple of weeks, in between ferrying my visiting in-laws around town. And this week's a busy one as well, can't wait to get started!