First I drew a circle using a circle cutter roughly the size of my cupcake.
Then I drew the picture of the owl within the circle.
Finally, I traced its shape onto card stock & cut out the template.
Roll out some yellow fondant.
Cut out the owl's shape using the template.
Cut out grey fondant using a small flower cutter.
Doncha love the combination of grey and yellow?
These "flowers" will be used to form the owl's eyes...
...like so!
I used a bit of water to stick the fondant together.
Next I used my smallest circle cutter to cut out the "whites" of his eyes,
and stuck them on. Repeat for the other eye.
Next, roll out some black fondant.
All the fondant eye components were rolled pretty thin.
I used a piping tip to cut out the "blacks" of the eyes.
All the different parts ready to be assembled.
(Oh yes, keep them under cling wrap so they don't dry out!)
Stick the black eyes on.
This part requires nimble fingers.
Roll out some teeny tiny balls of white fondant between your fingers to highlight the eyes.
Then roll even tinier balls for the highlights again.
Stick one under each of the first two balls.
That's how it should look.
For his nose/beak, roll out some peach or orange fondant and cut out
with an oval cutter with pointy ends.
(This cutter came in a set with a tiny heart, spade, diamond, club etc.)
Use the pointy end to cut into the oval and...
...voila! A beak!
Stick it on gently.
Cut more ovals as we'll use them for the feet too, like this!
Lay two next to each other, then stick a third on top.
For the 40 cupcakes I made, I cut up about 240 of them (with some help of course!!)
Here're a few of them:
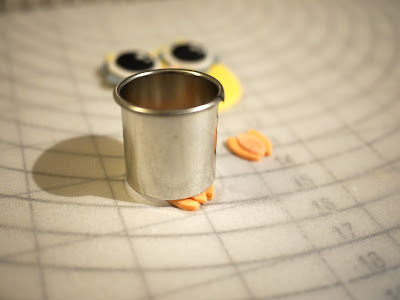
Once the feet trios are made, use your small circle cutter again to cut out the bottoms.
(Teehee...doesn't it look like a barrel trying to run away?)
Cut the feet, stick them onto the owl and tadaaa!!
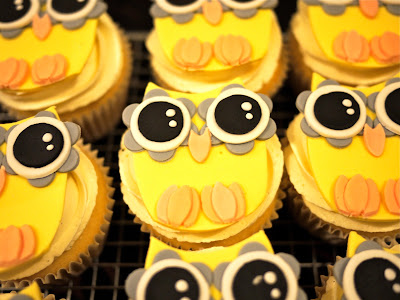
Owl cupcake toppers!
I also made a little "girly" owl using pink fondant for the belly:
Here's how they looked, side by side:
The finished cupcakes!
Hoooot hooooot!!
There! Hope you enjoyed the tutorial as much as I did making these cute lil' hooty owls!
PS. And see you at the Southside Handmade and Vintage Market on July 28th! Me and Peek Sweets will be there selling our wares.


